Tumbleweed is looking for a new crew to call her home. She is small enough to be single-handed, but large enough to accommodate a couple comfortably. SOLD!
Last week my orbital sander began “bucking”. We had purchased the Ryobi orbital sander last year for removing brown paint from upright areas of the boa, the sander has seen less than 25 sheets of sandpaper and was still covered under its 3 year warranty, so I called the warranty 800 number for Ryobi. I was told to take it to the nearest Home Depot tool rental center, which is about an hour drive each way. We were told that we would need to pay an initial fee for Home Depot to inspect it, but that our fee would be refunded since it was under warranty. We travelled to Sarasota, paid our $20 and left it for the repair guys. In the mean time, we purchased a Dewalt orbital sander online with variable speeds and a carrying case from Amazon.com.
The day the new sander arrived the Home Depot guys called, our sander was fixed they said–turns out it was a loose screw, not covered under warranty for this $29.00 sander. I called Ryobi and when I asked the woman at the other end of the line how self-loosening screws on a sander were not covered, she told me in broken English that I must be “using it wrong.” What? We picked up the repaired sander along with some paint and were given a “discount” on the paint, so that the total charge on the sander was $6.00.
Still bucking.
Sanding wrong? This is not my first major boat sanding project using an orbital sander. Oh well. I hung up before rude comments escaped my mind and blurted out over the phone lines.
Today, was sanding day. I tried the newly repaired Ryobi sander first–yep, you guessed it, it still ” bucks. Sigh. I am so glad I purchased the Dewalt sander–its quieter, has 6 speeds, the sandpaper stays on and the filter bag stays on as well. I used about 12 pieces of 80 grit sandpaper on cockpit today, hopefully this new sander will hold up to the DeWalt reputation. So far, I have invested as much in the Ryobi product as I paid for my Dewalt. Next time I think I will choose the quality tool rather than the cheap tool, especially when it is something that will get a lot of use on our boat.
We have been downsizing for 5 years now. This week we cleared the final items out of our storage unit. Family heirlooms have been dispersed or placed for safekeeping with close relatives. Now, just a little more tweeking and almost everything we have in Florida will fit on the boat.
When you live aboard a boat and want to possibly move locally to another marina, it can be a complicated process. There are slip fees, taxes on the fees, electrical charges, pump out charges, live aboard fees, and sometimes other hidden fees. Slips are not all a uniform size either–you have to know how long your boat is (loa or length over all), how wide your boat is (beam) and the minimum depth you need (draft). Then you need to know if living on the premises is allowed, are your pets welcome, and what amenities you need or want. There are floating docks and stationary docks, tide tables, and rules. And if you are still somewhat land bound, you will find that most marinas do not provide adequate parking for your car or truck.
And you may need to know if your mast will fit under the bridge you will encounter on the way to the marina. Active Captain is a good place to start, but it’s not comprehensive, at least not yet. Today I have viewed several marinas in a 10 square mile area all claiming to be “the premiere” marina in the area, all with varying amenities and high price tags. Most do not allow liveaboards (people who live on their boats fulltime.) Marinas that do allow liveaboards often charge a monthly liveaboard fee that is supposed to cover ammenities, sometimes it is a per person charge. Electricity when plugged into a marina dock comes in at least three different configurations and you will need to know what your boat needs, because they are not interchangeable–the most common are: 30 amps and 50 amps.
Some marinas allow you to do work on your own boat, some do not–hoping you will hire them to do your repairs. Check for safety practices too–I’ve seen a lot of accidents waiting to happen at marinas. Some have a list of approved service providers, which often have to carry their own insurance. (One of my neighbors for example, cleans boat bottoms, but is not on the marina service provider list where he lives because the amount of insurance required to be on the list is prohibitive.) Safety applies to neighborhoods too.
There are also various discounts when shopping for marinas. Some give member discounts for membership in BoatU.S. , Sea Tow , or the America’s great Loop Cruiser’s Association . Yacht clubs also sometimes have a reciprocal agreement and seasonal rates often apply. Some require deposits, or first and last month’s slip fees for leases or damage deposits for transient slips. I have noticed prices increases compared to last year at this time too, and are not always reflected on a marina’s website. Email requests seem to get put aside at most marinas that I have dealt with so far, the best responses have been telephone calls during business hours–usually Monday-Friday in this part of Florida. So, if you need to find a wet slip (a slip in the water as opposed to one on land) at a marina make a list.
Know the make, model, year, hull type, LOA (length over all) of your boat, your beam width, your draft, and your mast height if applicable. Then keep a pen and paper along with a calculator handy. Ask about the slip fees, taxes, liveaboard fees, and pet restrictions. Ask about amenities and electrical outlets. Then, if you are planning to be at that marina for a while, visit the marina before signing on the dotted line so that you can check for safety issues. Wish me luck as I continue to look for that needle in a haystack–a perfect balance of price, amenities, safety and availability.
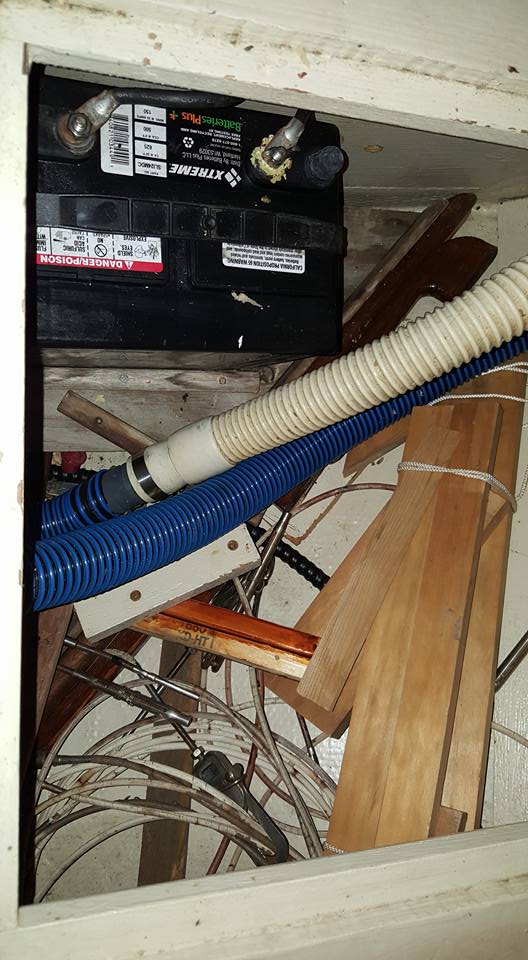
I finally decided how to start a thorough stern to bow inventory of our sailboat contents. Sounds simple enough, but if you are living aboard while trying to do the inventory, you have to find a place to put the stuff that is in the way of getting to the stuff you want to identify, count and maybe even photograph. I decided today was the day. I removed all of the bedding, including mattresses and memory foam pads on top of the mattresses. This is an opportunity to vacuum and clean the berth (bed) platform which houses storage lockers. There are three storage lockers under our bed in the aft cabin–starboard, center and port.
Our starboard locker houses one of our batteries, old life lines, and scraps of teak wood for repairs or leftovers from previous owner alterations.
Central locker: holding tank and rudder mechanism.
The center compartment holds a fairly new plastic black water holding tanks (yes a holding tank for poo), the depth sounder and steering mechanism for the rudder.)
Port locker sans contents.
The starboard locker holds more old life lines, and something that appears to be our knotmeter (boat speedometer.)
I take photographs as well, because I may have misidentified an item that my husband is looking for and there are just too many mystery items on a boat to identify them as thingies. The port locker has items that may not respond well to shifting heavy objects, so I have opted to store our winter blankets there along with dry bags and duffles.
So, along with a list and a map of areas and the names I have given each locker, the inventory continues.
We love spicy food, but when storage space for spices in a tiny galley is a big issue, so how do you keep those spices on hand?
I scoured the internet. I questioned other boaters. And then I started experimenting. Maybe a small container with multiple spices would do. So when I saw this at one of my favorite stores and used it onboard. It is good for a short camping trip, but an unsatifactory solution, but it fits in a very small space. The wee multi-spice cabinet box–is cute, but just not enough for our purposes.
Itty bitty spice cabinet
Next I tried a solution this great solution proffered by a boater that worked well for her. She used clear bead storage jar units with boxes. I had to stack the units in my cabinet, which required putting silicone on the bottom of one unit so that it didn’t slide around. I was constantly refilling the jars and needed to take both units out every time I cooked taking up valuable counter space. The jars also were not as airtight as the jars you purchase spices in, so my spices began clumping.
Bead Jar Spice Boxes
So, I began searching for anothe solution on the internet. My criteria: 1) easy access, 2) uses jars available anywhere, 3) room for lots of variey, 4) fits in my cabinet, and 5) doesn’t rust.
Eureka!!
I scoured the internet again. I found a product that seemed to fit my criteria, but it seemed too good to be true. It wasn’t cheap, but if it would work, I was willing to pay. I found a store in town where I could look at the cabinet,and if my measurements were off, I could return it. It worked! I can access my spices while I am cooking without taking up valuable counterspace. I have been using this for more than 6 monts, and I love it!
I have been working diligently on our cookbook, A Taste of Home, and finally finished it. I have been advised to stay off my foot that I injured just after we returned from a trip to New Orleans. Crutches are a real pain when you live on a boat. Our finger dock is fixed, so as the tides go in and out we either have to step up onto the dock or down onto the dock, with up to a 4-foot variation depending on the time of day. We also face south with prevailing winds coming from the West or East, so we might be close to the finger dock, or we might have to pull the boat closer against the wind to get on or off–so I stayed on the boat most of the time to give my foot a chance to heal and put the time to good use, refining my writing projects. (I have also finished a short biography on Thomas Wildcat Alford and a MAP Peer Review.) Download our free cookbook now: Cookbook 2019 1.1.19
UPDATE: The article on Thomas Wildcat Alford will be featured in the Summer 2017 edition of The Chronicles of Oklahoma.Alford Article Available Here
After you have lived aboard a small boat with way too much stuff for a full year in Florida, you realize there are a few things you could have brought with you that you miss, but of the items you thought you might need just take up precious space. The boat seems impossibly cluttered and disorganized, so in preparation for cutting the docklines, lots more stuff needs to go.
Did we use our winter socks, even once during the coldest months here in Florida.? No, nor raincoats, or mittens or winter shirts. How many pans can you use at once on a two burner stove? Do I really need to make a soup pot full of anything for 2 people? How many spatulas do I need? How many blankets, even with company? Did I really use any of those “necessary” resource books? The list goes on. Some things will go to a new permanent home, some to long term storage with family, some items will go to the storage building, just in case I might need them over the next few months so that I don’t have to repurchase anything if I cut back too deeply.
I am so looking forward to feeling less cluttered, now the work begins . . .
I’m not sure where the idea came from, but it sounded like an adventure we just couldn’t pass up–living on a sailboat and cruising to far away places when we retired in just a few years. Every dream needs a plan to come to fruition, so–we began to dream and plan. First we needed to find out if we got seasick, then we would need to learn to sail. We read every cruising adventure book we could find–both good and bad experiences. We researched vessels for liveability, safety and seaworthiness. We visited boatyards, in short we became obsessed with sailing.
We decided that we could learn to sail on a small boat, and test our theories, so we began lurking on eBay, searching for that perfect project boat. We saw a 23 ft. Aquarius, with a trailer up for auction through Boat Angel. We placed a bid, just for “practice” knowing that our low bid wouldn’t get us anywhere near the actual selling price. Imagine our shock when we discovered we had placed the winning bid and could now go pick her up from across the pond in New London, Wisconsin at the Rawhide Boys Ranch.
Ebay photo of our 1974 Aquarius 23.
We arrived in New London about six weeks later and were surprised to be told that we needed to look her over first to see if we really still wanted to buy her. We tromped out to a weedy field where she sat–our first sailboat. She needed a considerable amount of love, but it was difficult assessing that amount due to the infestation of hornets that considered her their home. First we had to evict the hornets, then on to our first boat purchase–new tires for her trailer so that we could get her home through Chicago. We discovered that it was less expensive to purchase new wheels with tires on them than to purchase just new tires. [I had to place that wee bit of knowledge in my “Things that make you say hmmmm” file.]
Old tires from the eBay photos.
We cleaned her up in the yard and placed her where we could view her from the dining room. We then assessed her sails and equipment. Her sails were servicable, but most of her needed an overhaul.
Mainsail with the model and hull number.
We decided that we needed to test ourselves regarding seasickness by booking a day sailing cruise on our upcoming trip to the Bahamas for the Junkanoo Celebration. We also wanted to find out if we were spending time dreaming about a place we might not want to go. So we booked a flight, rented a room, and took our walking shoes. We wanted to see the sights, explore the markets, and eat island foods where the locals ate.
Cleaning, sanding, patching, sanding, painting, sanding–did I mention sanding? We worked on her for the next year, as plans took shape to take her to Grand Traverse Bay and learn to sail. We read important “how to” books like Sailing for Dummies and numerous ASA course books. We even toyed with the idea of buying lessons, but in the end we opted for the “dyi” method–do it yourself. We replaced a through hull for the knotmeter, removed and replaced the stays, purchased new lines, patched all the dings and dents, sanded her smoth, and started on the interior. The interior upholstry, curtains, cushions and shelving were rotted–needing replacement. The head needed a new portable toilet and a base to set it on. The interior needed mold removal, sanding, repair to the hatch cover, and added ventilation.
The stern shortly after work had begun.
We eventually removed all of the old shelving, painted the interior with a mold resistant paint, installed 2 solar powered vents, repaired the hatch cover, made new curtains from a new shower curtain, replace the foam and made new seats with just a wee bit of supervision.
Trouble supervising interior boat repairs.
By vacation time in August 2013, out she was ready to set sail from Traverse City to anchor off Power Island for a week. We reserved a slip at the local public marina in case of inclement weather and spent the first night there. We inflated out new dinghy, put the small motor we had purchased for our canoe on it, and decided to experience sailing in small steps. We motored out to Power Island and discovered the difference first hand between the windward and leeward sides of the island. The windward side had rocky shallows and high winds, but the leeward side had a sheltered bay and peaceful waters with a glorious view. We dinghied ashore and walked the trails. Life was good aboard the Drnkyn Mnchkyn. We returned to the marina that first night just as the afternoon winds picked up. We were having difficulties so decided to remove the dinghy motor and use it on the Drnkyn Mnchkyn to get into the Slip, but before we got the motor transferred, help arrived and we were securely cleted in place for the night.
Sunset at Power Island.
We held our renaming ceremony borrowed from Blue Sailing. She was now officially the Drnkyn Mnchkyn.
Denaming and Renaming Ceremony
We learned to sail on Grand Traverse Bay, but not without incident. We decided that it would be great to travel by sail to a pub on the bay as an act of celebration. We located a pub with a field of mooring balls free to guests one in Omena, just past the entrance to Sutton’s Bay. We were admiring the wind in the sails and our view of the Stony Point at the entrance to Sutton’s Bay when suddenly we were standing in the cockpit on the walls, starboard lifelines touching the water. Trouble jumped into the cabin and ran across the starboard wall headed for his little nest in the bow. We never suspected that the wind coming off the point could put make our lifelines touch the water–a few seconds of terror in an otherwise fine sail. Lesson learned: always be prepred for sudden wind changes when encountering a point.
Moored at Omena, Michigan.
We motored the rest of the way to the pub, then chose our mooring ball, hooking it like pros and headed for the pub. We enjoyed a great meal with a couple of beers and returned to our little boat for the night, little did we know that we had chosen the mooring ball from hell. We were sleeping peacefully when the storm rolled in later that night and our boat began bumping on an old wreck below us. Bang, swoosh, bang with torrential rain; at least the boat didn’t leak.
We motored back across Sutton bay in fowl weather the next day, encountering a cargo ship for the first time as we heade south across the entrance to Sutton’s Bay. The ship seemed to be on a direct collision course with us, but it was an illusion, its greatest danger to us was the wake. Nauseating and scary for newbies, but not dangerous. The weather forcast was ominous, however, so we made a beeline for the marina. We reached Traverse City before the storm in the heat of the day. The dockhand ran to help us and said throw me the rope, perfect throw, great catch–too bad it wasn’t tied to the boat first. I’ll probably never forget that first important step again!
Drnkyn Mnchkyn with members of the Oz cast at the Oz Fest in Ionia , Michigan.
Eventually, we fell in love with a Hallberg-Rassy and would go visit her every chance we got. We talked to her, patted her hull, and dreamed of taking her to foreign ports, but she had one tiny feature that shouted imperfection to us–you had to access her aft cabin through the cockpit. What if the weather was bad? We couldn’t imagine having to get up in the middle of the night and opening 2 sets of doors to get to the head. *Sigh* so, we began looking at other center cockpit designs.
S2 Yachts were built in Holland, Michigan during the 1970s and 1980s, and their center cockpit models featured floor plans with an interior hallway to the aft cabin.It was a whirlwind courtship. We found a 1984 S2 9.2C located at a boatyard/marina in Cortez, Florida for sale that we could look at in October 2014. We fell in love with her and worked on plans to acquire her, though we were doubtful we would qualify for a boat loan. She needed work, but the asking price was low enough to entice us anyway. We qualified for the loan, purchased her November 11, 2014. But she was in Florida, we still lived in Michigan. In fact we lived in rural Michigan on 3 acres with a 3 bedroom, 2 bathroom house with a full basement and a huge pole barn, not to mention a gardening shed. So, if you think you might want to live on a boat, what do you do with all that stuff that you have accumulated over the last 40 years? You have yard sales, and then you have an auction!
The mid-December auction did clear out lots of items, but it was not very lucrative and items were sold that we had planned to keep–that’s what happens when the auction crew shows up a bit early. We were not any better off financially, but we were free to start living our dream. We moved aboard the S/V Tumbleweed on December 28, 2014.
 Last week my orbital sander began “bucking”. We had purchased the Ryobi orbital sander last year for removing brown paint from upright areas of the boa, the sander has seen less than 25 sheets of sandpaper and was still covered under its 3 year warranty, so I called the warranty 800 number for Ryobi. I was told to take it to the nearest Home Depot tool rental center, which is about an hour drive each way. We were told that we would need to pay an initial fee for Home Depot to inspect it, but that our fee would be refunded since it was under warranty. We travelled to Sarasota, paid our $20 and left it for the repair guys. In the mean time, we purchased a Dewalt orbital sander online with variable speeds and a carrying case from Amazon.com.
 We have been downsizing for 5 years now. This week we cleared the final items out of our storage unit. Family heirlooms have been dispersed or placed for safekeeping with close relatives. Now, just a little more tweeking and almost everything we have in Florida will fit on the boat.


 Ebay photo of our 1974 Aquarius 23.
 Mainsail with the model and hull number.
The stern shortly after work had begun.
Trouble supervising interior boat repairs.
Sunset at Power Island.
Denaming and Renaming Ceremony
Moored at Omena, Michigan.


 Drnkyn Mnchkyn with members of the Oz cast at the Oz Fest in Ionia , Michigan.
 We talked to her, patted her hull, and dreamed of taking her to foreign ports, but she had one tiny feature that shouted imperfection to us–you had to access her aft cabin through the cockpit. What if the weather was bad? We couldn’t imagine having to get up in the middle of the night and opening 2 sets of doors to get to the head. *Sigh* so, we began looking at other center cockpit designs.
 It was a whirlwind courtship. We found a 1984 S2 9.2C located at a boatyard/marina in Cortez, Florida for sale that we could look at in October 2014. We fell in love with her and worked on plans to acquire her, though we were doubtful we would qualify for a boat loan. She needed work, but the asking price was low enough to entice us anyway. We qualified for the loan, purchased her November 11, 2014. But she was in Florida, we still lived in Michigan. In fact we lived in rural Michigan on 3 acres with a 3 bedroom, 2 bathroom house with a full basement and a huge pole barn, not to mention a gardening shed. So, if you think you might want to live on a boat, what do you do with all that stuff that you have accumulated over the last 40 years? You have yard sales, and then you have an auction!
 The mid-December auction did clear out lots of items, but it was not very lucrative and items were sold that we had planned to keep–that’s what happens when the auction crew shows up a bit early. We were not any better off financially, but we were free to start living our dream. We moved aboard the S/V Tumbleweed on December 28, 2014.